sublimated

How to build a simple 3D model viewer on Ubuntu 12.10

Suppose you want to cook up something to view 3D models for animation, solids modeling, and suchlike. Blender does the job but it has so many bells and whistles included that it makes a poor choice to add into your own C codebase. Thankfully the folks over at lib3ds have a nice library which can render files using Audiodesk’s 3D-Studio .3ds format. This tutorial explains how to build and run their sample code.

The first step would be to install a minimal set of compiler tools for C on Ubuntu using the terminal:

sudo apt-get install build-essential

From there you can install lib3ds-dev which will give you the shared object and header files necessary to build lib3ds code.

sudo apt-get install lib3ds-dev

After that you should decompress the example code into a directory. For instance:

cd $HOME/Desktop
mkdir 3dsplay
cd 3dsplay
gzip -d < /usr/share/doc/lib3ds-dev/examples/3dsplay.c.gz \
> 3dsplay.c

Next you can use a Makefile I wrote to build the example.

sudo apt-get install wget
wget http://bit.ly/Va0mQa
sudo apt-get install freeglut3-dev
make

You ought to be able at this point (if there were no problems) to load up a .3ds file and view it in a window.

wget http://bit.ly/Uxdphy
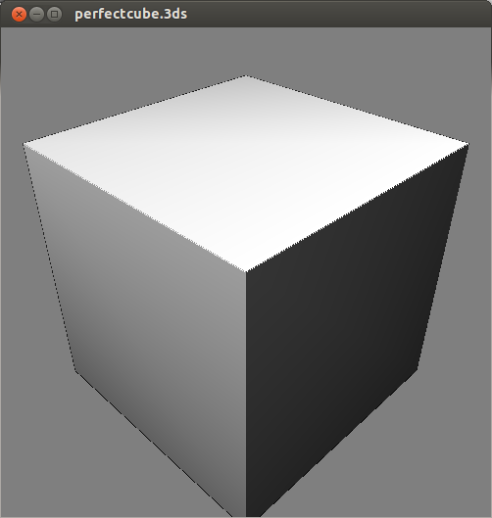
./3dsplay perfectcube.3ds

Here’s what I see on my display after all that:

Image

Also the previously mentioned Blender can export a variety of 3D file formats to .3ds. For example, you can grab one of .blend files from this collection to get a few more examples to play.

2012 Angry Men

Hello to all that. 

Standard Issue:

(1) Beach House [Bloom]
(2) Tennis [Young and Old]
(3) Purity Ring [Shrines]
(4) Alt-J [An Awesome Wave]
(5) Flying Lotus [Until the Quiet Comes]
(6) Frank Ocean [channel ORANGE]
(7) Grimes [Visions]
(8) Hospitality [Hospitality]
(9) Chromatics [Kill For Love]
(10) Totally Enormous Extinct Dinosaurs ‎[Trouble]

Honorable Mention:

Bonobo [Boiler Room Mix : Feb 2012]
Voices From The Lake [Voices From The Lake]
Clams Casino [Instrumental Mixtape 2]
Levon Vincent [Fabric 63]
Menomena [Moms]

Albums that I only really started listening to this year, but came out sometime before then:

King Krule [King Kurle]
Ten Ft. Ganja Plant [Hillside Airstrip]
Nosaj Thing [Drift]
Daniel Ellsworth & the Great Lakes [Civilized Man]
Bon Iver [Bon Iver]

Using the KGS Go Server on OS X 10.8 Mountain Lion

On my computer at least the “Play Go Now” link on KGS doesn’t work. The quick workaround is to click the CGoban3 link on KGS and then double click on the downloaded cgoban.jnlp file. This should prompt you to enable Web Start applications. If you click “Enable” then you should see the CGoban3 Main Window, which has a “Play on KGS” button and from there you can log in (or click Guest if you are just getting started).

However, this easy method doesn’t make a permanent application for later use. Below are some better instructions that will install CGoban3 in Applications. You’ll first need to start /Applications/Utilities/Terminal. Next you’ll have to allow Java Web Start applications. To turn it on you need to access the Java Preferences. So, first run the following command:

# Open Java Preferences
/Applications/Utilities/Java\ Preferences.app/Contents/MacOS/Java\ Preferences
# Make sure Enable applet plug-in and 
# Web Start applications is checked.
# Close the Java Preferences window.

After you’ve enabled Java Web Start you can next launch javaws from the Terminal with a link to the KGS Application. This will prompt you to save CGoban.app:

# Launch CGoban with Java Web Start
javaws http://files.gokgs.com/javaBin/cgoban.jnlp
# You may briefly see a Downloading application progress bar.
# A file dialog appears chose the folder /Applications.
# Click "Save" to put "CGoban 3.app" 
# into the Applications folder.

After you’ve saved the Application, CGoban will launch and show the main window. As with before you can log in or get started as a guest. Have fun.

The overly curious among you might wonder what would happen if you directly try to run javaws before enabling Web Start:

javaws http://files.gokgs.com/javaBin/cgoban.jnlp

The first time OS X will prompt you to enable Web Start and even if you click enable it will dump you back at the prompt with an error message stating:

No Java runtime present, requesting install.
Unable to locate a Java Runtime to invoke.

But the second time javaws will actually work as expected, since Web Start is now enabled. Incidentally, if you run into trouble it is also worth mentioning that you can reset the local Java cache and thereby delete old or broken copies of CGoban (among other things). To do this, first look under the Java Preferences > Network tab next click the “Delete Files…” button. Anyhow, I hope this helps other Go players on the Mac get KGS up and running to their satisfaction.

11 Oceans

The year in which wub-wave became clichéd at half the usual number of beats per minute.

Standard Issue:

(1) Real Estate [Days]
(2) The Weeknd [House of Balloons]
(3) tUnE-yArDs [w h o k i l l]
(4) SBTRKT [SBTRKT]
(5) The Field [Looping State of Mind]
(6) Cults [Go Outside]
(7) Neon Indian [Era Extrana]
(8) Washed Out [Within and Without]
(9) Starfucker [Reptilians]
(10) Royal Headache [Royal Headache]

Honorable Mention:

Star Slinger [Fabric Mix April 2011]
Purity Ring [Ungirthed 7″]
Shabazz Palaces [Black Up]
Tycho [Dive]
Cut Copy [Zonoscope]

Albums that I only really started listening to this year, but came out sometime before then:

Steve Reich [Music for 18 Musicians]
Toro y Moi [Causers Of This]
The Clean [Mixotheque NZ Vol. 1: Tally Ho!]
Richard Wagner [Wilhelm Furtwängler dirige Richard Wagner]
Small Black [New Chain]

Installing Cuda 4.0 on Ubuntu 11.04 64-bit

Here are some rough notes describing my steps to get Cuda 4.0 installed and the SDK samples built on Ubuntu 11.04 (Natty Narwhal) 64-bit. I’ve cribbed some steps from Shenbo Yu’s instructions but installed components into “/opt”. First you must download the Cuda 4.0 install files.

From there you want to get:

  • devdriver_4.0_linux_64_270.41.19.run
  • cudatoolkit_4.0.17_linux_64_ubuntu10.10.run
  • gpucomputingsdk_4.0.17_linux.run
# turn off X
sudo stop gdm

# uninstall any previously installed Nvidia drivers
sudo apt-get --purge remove nvidia-*

# make all the installers executable
chmod +x ~/Downloads/*.run

# run the driver installer
sudo ~/Downloads/devdriver_4.0_linux_64_270.41.19.run

# reboot
sudo reboot

# install dependencies
sudo apt-get install libxi-dev libxmu-dev freeglut3-dev gcc-4.4 g++-4.4 build-essential

# install toolkit
sudo ~/Downloads/\
 cudatoolkit_4.0.17_linux_64_ubuntu10.10.run

# install SDK
sudo ~/Downloads/gpucomputingsdk_4.0.17_linux.run

# I use /opt/NVIDIA_GPU_Computing_SDK because
# I like my home directory uncluttered

# Set path variables
export PATH=$PATH:/usr/local/cuda/bin
# 32-bit would use lib instead of lib64
export LD_LIBRARY_PATH=/usr/local/cuda/lib64:/usr/lib
# You probably want to append these to your .bashrc if you use cuda frequently

# install gcc 4.4 into a directory for nvcc to use
sudo mkdir /opt/gcc44
sudo ln -s /usr/bin/cpp-4.4 /opt/gcc44/cpp
sudo ln -s /usr/bin/gcc-4.4 /opt/gcc44/gcc
sudo ln -s /usr/bin/g++-4.4 /opt/gcc44/g++

# modify cuda to use this gcc 4.4 installation
sudo bash -c "echo 'compiler-bindir = /opt/gcc44' >> /usr/local/cuda/bin/nvcc.profile"

# Make the SDK examples
cd /opt/NVIDIA_GPU_Computing_SDK
sudo chown -R [username] .
make

# Try out an example
./C/bin/linux/release/smokeParticles

Building OpenGazer 0.1.2 on OS X 10.6

For a project in development we’ve been experimenting with OpenGazer. The system needs a bit of coaxing to work on OS X. To help other folks along here is a Makefile which works with the current version of OpenGazer.


# Before running make you first need to do the following:

# sudo port install vxl gtkmm
# svn co https://opengazer.svn.sourceforge.net\
# /svnroot/opengazer

VXLLIB = /opt/local/lib/vxl/
VERSION = opengazer-0.1.2
CPPFLAGS = -Wall -g -O3
LINKER = -L$(VXLLIB) -L/opt/local/lib -lm -ldl -lvnl -lmvl -lvnl_algo -lvgl -lgthread-2.0 

INCLUDES = -L/opt/local/lib/vxl/ -I{/usr/local/include,/opt/local/include/vxl}{,/core,/vcl,/contrib/oxl}

sources = opengazer.cpp Calibrator.cpp GazeTrackerGtk.cpp HeadTracker.cpp LeastSquares.cpp EyeExtractor.cpp GazeTracker.cpp MainGazeTracker.cpp OutputMethods.cpp PointTracker.cpp FaceDetector.cpp GazeArea.cpp TrackingSystem.cpp GtkStore.cpp Containers.cpp GraphicalPointer.cpp Point.cpp utils.cpp BlinkDetector.cpp FeatureDetector.cpp Alert.cpp 

objects = $(patsubst %.cpp,%.o,$(sources))

%.o.depends: %.cpp
	g++ -MM $< > $@

%.o: %.cpp 
	g++ -c $(CPPFLAGS) -o $@ `pkg-config cairomm-1.0 opencv gtkmm-2.4 --cflags` $(INCLUDES) $< 

opengazer: 	$(objects)
	g++ $(CPPFLAGS) -o $@ `pkg-config cairomm-1.0 opencv gtkmm-2.4 --libs`  $(LINKER) $^

include $(patsubst %.cpp,%.o.depends,$(sources))

TAGS: always
	etags *.cpp *.h

ship: always
	mkdir $(VERSION) || rm -fr $(VERSION)/*
	cp LICENSE README Makefile calpoints.txt haarcascade_frontalface_alt.xml $$(for file in $$(cat $(addsuffix .depends,$(objects))) ; do test -f $$file && echo $$file ; done | sort -u) $(VERSION)/
	tar czf $(VERSION).tar.gz $(VERSION)
	cp $(VERSION).tar.gz README /home/ftp/pub/www/opengazer/

.PHONY: always ship

clean:
	rm -rf opengazer
	rm -rf *.o
	rm -rf *.o.depends

DIY Book Index Generation using Python

Recently I published Devices Alter Perception 2010 in paperback format. I learned a bit about editing books and technical material when I studied Technical Communication as an undergraduate (although that department has since morphed into Human-Centered Design and Engineering).

Working with Gunnar Green of TheGreenEyl, we took the PDFs supplied by workshop participants and reworked the text and layout using InDesign 5. While InDesign can “generate” an index, it actually needs a set of keywords. InDesign really just renders the index and isn’t smart enough to figure out what words should be included.

At this point I did a bit of research into what is available for index generation. Over on MetaFilter you drop in to an informative thread about the variety of options. You might want to hire a professional indexer or pay for some software. But if you are like me you might start to view index generation as a very simple pattern recognition problem.

What follows are some building blocks for index generation written in Python and using nltk. I used them to generate an index for the multi-author workshop proceedings book mentioned above. The instructions assume you have Python and nltk installed on your computer.

Step 1:

Get your text into plaintext format with a decent encoding. I’d recommend UTF-8 as it has good unicode support. For convenience I’ve named this plaintext file “book.txt”.

Step 2:

Start simple by just making a histogram of the words appearing in the text. I wanted to just make a CSV file that I could open in Excel, Numbers, Mathematica or R. After looking over the most frequently occurring words, I was able to manually screen out parts of speech, punctuation and find the words which were meaningful to my book.

The following code opens up a file book.txt and prints out a comma-seperated list consisting of the term frequency and the term itself:

import nltk
from nltk import word_tokenize
import operator
from collections import defaultdict

text = open('book.txt').read()
words = word_tokenize(text)

# improvement due to patch by Paul Masurel
frequencies = defaultdict(int)

for w in words:
    frequencies[w] += 1

# sort the list before printing
for word, freq in sorted(frequencies.iteritems(), key=operator.itemgetter(1)):
    print str(freq) + "," + word

Step 3:

Looking over a typical book, one quickly realizes that a hefty part of a good index consists in multiple word phrases. And so I also built some programs to identify the most frequently occurring pairs of words (also known as bigrams):

import nltk
from nltk.collocations import *
from nltk.probability import *
from nltk import word_tokenize

from collections import defaultdict

text=open('book.txt').read()
words = word_tokenize(text)

bigram_measures = nltk.collocations.BigramAssocMeasures()
finder = BigramCollocationFinder.from_words(words)
finder.apply_freq_filter(3)

print finder.nbest(bigram_measures.pmi, 50)

A program to find trigrams is quite similar:


from nltk.collocations import *
from nltk.probability import *
from nltk import word_tokenize

text=open('book.txt').read()
words = word_tokenize(text)

trigram_measures = nltk.collocations.TrigramAssocMeasures()
finder = TrigramCollocationFinder.from_words(words)
finder.apply_freq_filter(2)

print finder.nbest(trigram_measures.pmi, 50)

Step 4:

Combining the output of Steps 2 and 3 I created a list of 1-3 word keywords.  Were I not in such a rush to get the book to press I might have paused to make output format of the bigram and trigram code similar to the CSV file, but I found that I only used a small number of phrases from this analysis which was easy enough to copy by hand. I then in my spreadsheet program whittled these lists down to a final index list which can be sorted alphabetically. If you’d rather not use a a spreadsheet the following script can alphabetize for you:

#!/usr/bin/python

import sys

if len(sys.argv) < 3:
    print "usage: alphabetize.py [input filename] [output filename]"
    exit(-1)

inputFile = open(sys.argv[1], "r")
outputFile = open(sys.argv[2], "w")

for line in sorted(inputFile, key = str.lower):
    outputFile.write(line)   

While these tools are a bit primitive, they do give you a bit more insight into how the index itself is built and thus allow you make your own decisions about what will be indexed. Think of them as helper tools to narrow down the list of candidates you might want to include based on frequency.
Re-titling a Mathematica Notebook Window

Mathematica’s manipulable interactive graphics can be built so quickly. This causes me to favor it for visualizations involving equations. However, other things are far too brittle, which might have something to do with the closed-sourced culture that produced Mathematica.

Suppose you want to have a new window title for a notebook you get from someone else or the Wolfram Demonstration Project. You started with another person’s code, but you’ve spent a lot of time modifying it and now it describes something entirely different. Before you try it, I’ll tell you that editing the notebooks with “Internal cache information” in a text editor is punished with infuriating warning messages and doesn’t work without further hacking.

Now that I’ve vented my spleen, here is a workaround to re-title the notebook it is pasted into:

SetOptions[EvaluationNotebook[], WindowTitle -> "Your Title Here"]

Ace of Spades on OS X

While Minecraft is the current champion of wonder-inducing and sandbox games, I do feel that Ace of Spades brings some new dimensions to the genre. Brute-force terraforming in order to trick players viewing the map makes an amazing game-within-a-game. Camouflaged bridges and visually salient decoys all make for an entertaining game.

So here I provide some rough notes for the process of running Ace of Spades 0.36 on Macintosh computers through Wine:

    1. Install macports. At present this requires downloading Xcode 3.2.6 first and then grabbing the macports installer. You can find instructions on the macports site.
    2. Open a terminal and install wine via macports with the following command. Beware that building wine is a lengthy process and took around 4~6 hours in my case.
    3. sudo port install wine
      
    4. Reconfigure wine to use a virtual desktop. The exact size seems to vary from system to system but 1024 x 768 seems to work on 2010 Macbook Airs and 800 x 600 works on 2007 Macbook Pros. You can accomplish this by running winecfg from the terminal. It may take some time to launch wine so be a little patient. When it does, click the graphics tab, select emulate a virtual desktop and set it to be 800×600 or 1024×768
    5. winecfg
      
    6. Download the Ace of Spades installer from Ben Aksoy’s site.
    7. Use wine to run the installer.
    8. wine msiexec /i ~/Downloads/aos036install.msi
      
    9. Once it is installed you can play AoS using the following command if you have a server address
    10. wine ~/.wine/drive_c/Program\ Files/Ace\ of\ Spades/client.exe -aos://432934936
      
    11. You can find aos:// addresses over on the Ace of Spades server listing. Just control-click on one of the game names and copy its link address. Paste the link into the terminal for your wine command replacing PASTE_LINK_HERE in the example below:
    12. wine ~/.wine/drive_c/Program\ Files/Ace\ of\ Spades/client.exe -PASTE_LINK_HERE
      

    It is a bit of lengthy process but is really worth all the mayhem and ingenuity happening in the AoS block worlds. Danger: for weekends and vacation time only.

Installing Cuda 4.0 RC on Ubuntu 10.10 64-bit

Here are some rough notes describing my steps to get Cuda 4.0 installed and the SDK samples built on Ubuntu 10.10 (Maverick Meerkat) 64-bit. At present you need an Nvidia developer account and once you’ve signed up for one you can download the Cuda 4.0 RC.

From there you want to get:

  • devdriver_4.0_linux_32_270.35.run
  • cudatoolkit_4.0.11_linux_64_ubuntu10.10.run
  • gpucomputingsdk_4.0.11_linux.run
# turn off X
sudo stop gdm

# uninstall any previously installed Nvidia drivers
sudo apt-get --purge remove nvidia-*

# make all the installers executable
chmod +x ~/Downloads/*.run

# run the driver installer
sudo ~/Downloads/devdriver_4.0_linux_64_270.35.run

# reboot
sudo reboot

# install dependencies
sudo apt-get install libxi-dev libxmu-dev freeglut3-dev gcc g++ build-essential

# install toolkit
sudo ~/Downloads/cudatoolkit_4.0.11_linux_64_ubuntu10.10.run

# install SDK
sudo ~/Downloads/gpucomputingsdk_4.0.11_linux.run

# I use /opt/NVIDIA_GPU_Computing_SDK because
# I like my home directory uncluttered

# Set path variables
export PATH=$PATH:/usr/local/cuda/bin
# 32-bit would use lib instead of lib64
export LD_LIBRARY_PATH=/usr/local/cuda/lib64:/usr/lib
# You might want to append these to your .bashrc if you use cuda frequently

# Make the SDK examples
cd /opt/NVIDIA_GPU_Computing_SDK
sudo chown [username] .
make

# Try out an example
./C/bin/linux/release/particles